The Genesis of a Medieval Manuscript
lquigley
You are here •Page 2 •Page 3 •Page 4 •Page 5 •Page 6 •Page 7 •Page 8 •Page 9 •Page 10 •Page 11 •Page 12 •Page 13 •Page 14 •Page 15 •Page 16 •Page 17 •Page 18 •Page 19 •Page 20 •Page 21 •Page 22 ♦Endnotes »Next page

|

|
Illumination taken from a psalter, created in Pavia, Italy, c. 1450. Add. 15114, f.48v
|
The author's foreword: |
Manuscript illumination from the Bamberg Apocalypse, c. 1000–20.
|


|
|

The Genesis of a Medieval Manuscript
lquigley
You are here •Page 3 •Page 4 •Page 5 •Page 6 •Page 7 •Page 8 •Page 9 •Page 10 •Page 11 •Page 12 •Page 13 •Page 14 •Page 15 •Page 16 •Page 17 •Page 18 •Page 19 •Page 20 •Page 21 •Page 22 ♦Endnotes »Next page
|
|

|
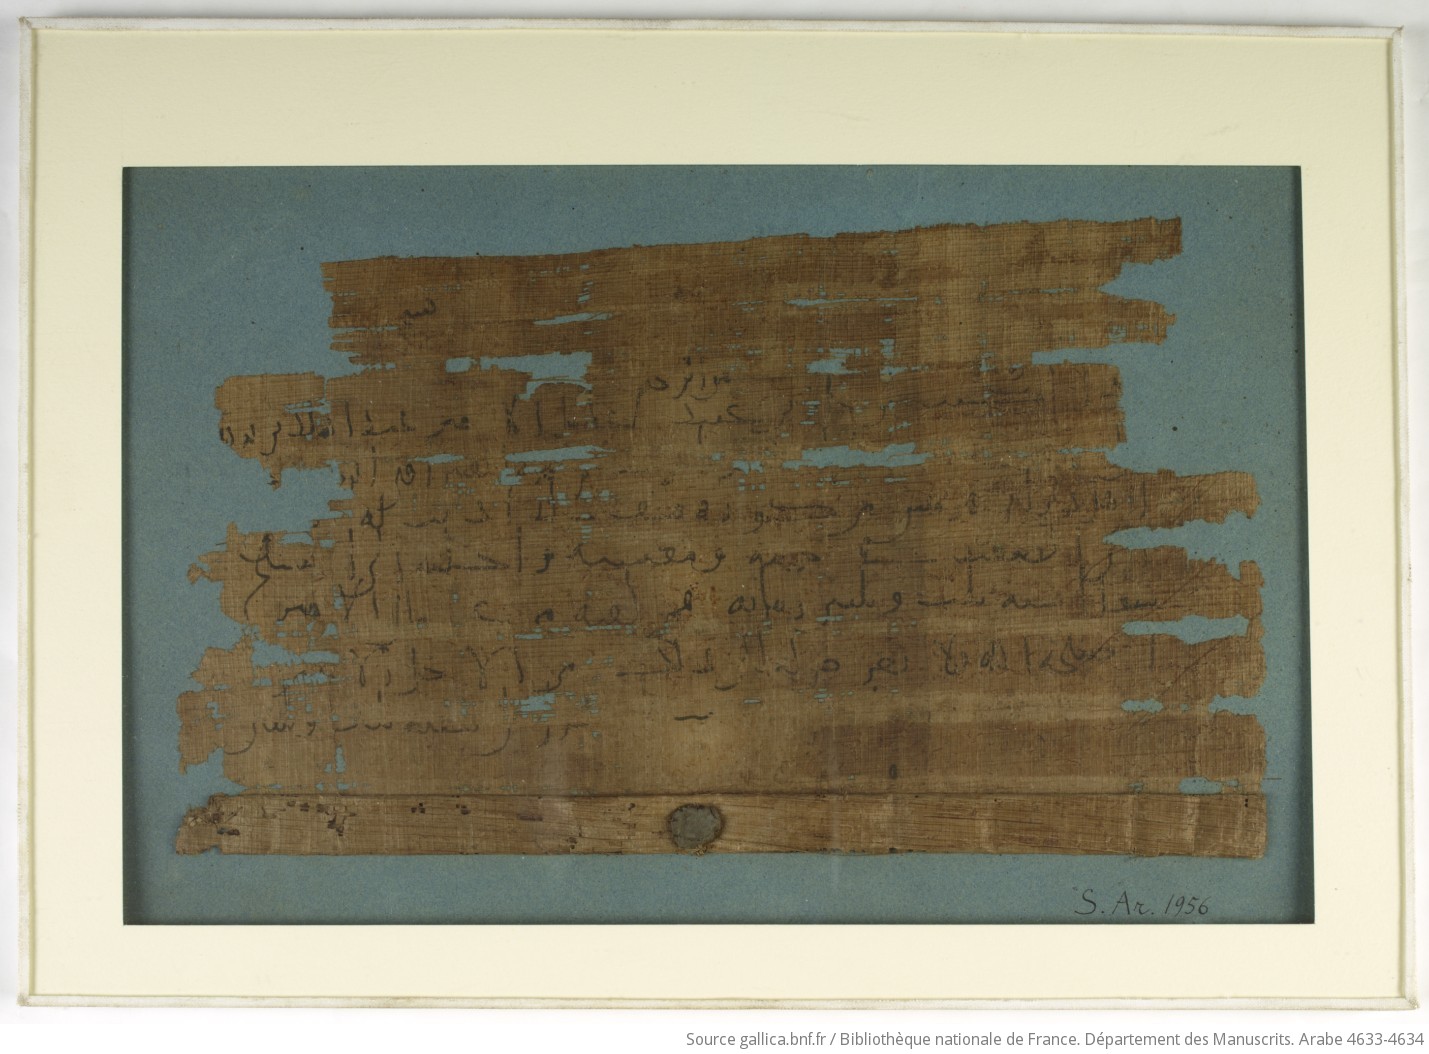
A piece of papyrus housed in the Abbey Library of St. Gall, in Switzerland.
St. Gallen, Cod. Sang. 226
|
Writing surfaces:
The creation of a medieval manuscript began with the production of parchment, the main material on which manuscripts were written. While parchment was indisputably the most common material on which medieval scribes wrote, manuscripts have also been found written on wax (which was waterproof and easily erasable, but which suffered from its cumbersome nature and lack of permanence), wood (which had the benefit of being lighter than many of the alternatives, but was susceptible to rot), and papyrus. The latter was the "most widely used writing support in the ancient world," and was introduced to northern Europe through the Roman empire (Graham and Clemens 3). Papyrus was made by cutting the pith of the papyrus plant -- a reed harvested almost exclusively from the Nile River Delta in Lower Egypt -- into "thin strips or fibers," and then pounding layers of these "together to form a single square" (Graham and Clemens 3). Much of our modern-day understanding of papyrus' creation comes from Pliny's Natural History, in which the philosopher details the process of making papyrus, in spite of having never made it himself. A brief tutorial on how to make papyrus in a modern-day setting can be found here. |
Tattered papyrus.
Bibliothèque nationale de France
|

|
|

The Genesis of a Medieval Manuscript
lquigley
You are here •Page 4 •Page 5 •Page 6 •Page 7 •Page 8 •Page 9 •Page 10 •Page 11 •Page 12 •Page 13 •Page 14 •Page 15 •Page 16 •Page 17 •Page 18 •Page 19 •Page 20 •Page 21 •Page 22 ♦Endnotes »Next page
|
|

|
A wax tablet, originating from Egypt circa 600 C.E.
Bernhard Bischoff, Latin Palaeography. Antiquity & the Middle Ages
|
Writing surfaces:
The gradual shift away from papyrus occurred around 30 B.C.E., after which medieval scribes began increasingly relying on other materials for their work. As mentioned earlier, wax tablets offered an easy, inexpensive surface on which to write (or, in reality, carve), and were "impervious to water" (Graham and Clemens 4). After the decline of papyrus, hastened by the collapse of the Roman Empire (which made it difficult to obtain the reeds necessary for making the material), wax tablets began to be used for note-taking surfaces, for rough drafts (as they were easily correctable), and perhaps most famously by the French royal court for traveling documents. These wax tablets made good travelling documents due to their inexpensive and waterproof nature (Graham and Clemens 4). A brief tutorial on the creation of wax tablets can be found here. Like wax, wood was inexpensive and easily correctable, needing only a bit of sanding to erase mistakes. Plato records wooden tablets as having been used "for ballots, legal records, and votive offerings," and use of boards for writing extended into the fifteenth century (Graham and Clemens 5). Our word codex, generally applied to books of bound parchment, was originally used to describe books of linked wooden writing boards. Much of our understanding of the construction of wooden codices comes from a 1986 archaeological find in Egypt, which "brought to light two codices, a farm account book and a compilation of Isocrates' Cypian Orations" (Graham and Clemens 5). Wood was also used in the form of the tallystick, a small wooden plank on which financial contracts could be drawn. Beyond wax and wood, metal surfaces were also used for writing. All of these surfaces would be supplanted by parchment, and ultimately by paper. |

|
|

The Genesis of a Medieval Manuscript
lquigley
You are here •Page 5 •Page 6 •Page 7 •Page 8 •Page 9 •Page 10 •Page 11 •Page 12 •Page 13 •Page 14 •Page 15 •Page 16 •Page 17 •Page 18 •Page 19 •Page 20 •Page 21 •Page 22 ♦Endnotes »Next page
|
|

|
Hair follicles visible in lower left corner.
British Library Harley 3557
|
Parchment:
Parchment, the eventual successor to wax, wood, and metal, is a material made from animal skins which have been cleaned, dehaired, stretched, then ultimately cut and dried. The early stages of the cleaning and dehairing process generally took place over the course of several days, during which the parchment maker would soak the skin for several days "in a bath of lime solution to loosen the hair," making it easier to eventually remove the hair. Hair removal and cleaning was generally done by placing the skin "over a beam of wood," working the skin with "a gently curved, two-handled blade" in a process called scudding. All of this led to what Graham and Clemens argue in their Introduction to Manuscript Studies was the most critical stage in the process: "drying the skin under tension" and stretching it out on a frame (10). The skin was attached and stretched on a medieval herse; while none of these machines have survived, evidence suggests "that the herse was sometimes square, sometimes round," and that the animal skin was attached by cords to the wooden frame of the herse (Graham and Clemens 11). Though the hair is entirely removed from the animal skin before the transcription process, it is possible to determine which side of the parchment once had hair -- the "hair side" -- and which side of the skin faced inward -- the "flesh side." The hair side of parchment is identifiable by the presence of hair follicles, which appear in the form of tiny dots, almost like minute pinpricks, across the surface of the skin. These follicles can be spread across the entire skin or clustered in smaller, darker patches, generally denoting the line of the animal's backbone (Graham and Clemens 11). In the example to the left, the follicles are clustered in the bottom left corner; in the example to the right, the follicles are smaller and are spread across the entire page. |
Hair follicles visible under close examination.
British Library Additional 15252
|


|
|

The Genesis of a Medieval Manuscript
lquigley
You are here •Page 6 •Page 7 •Page 8 •Page 9 •Page 10 •Page 11 •Page 12 •Page 13 •Page 14 •Page 15 •Page 16 •Page 17 •Page 18 •Page 19 •Page 20 •Page 21 •Page 22 ♦Endnotes »Next page
|
|

|
Quires: |
A diagram of a possible quire assembly pattern.
nazaroo.blogspot.com
|
Quires: |

|
|

The Genesis of a Medieval Manuscript
lquigley
You are here •Page 7 •Page 8 •Page 9 •Page 10 •Page 11 •Page 12 •Page 13 •Page 14 •Page 15 •Page 16 •Page 17 •Page 18 •Page 19 •Page 20 •Page 21 •Page 22 ♦Endnotes »Next page
|
|

|
Prickings clearly visible along the right-hand margin.
MA 63, f. 162r
|
Pricking: |
|
|

The Genesis of a Medieval Manuscript
lquigley
You are here •Page 8 •Page 9 •Page 10 •Page 11 •Page 12 •Page 13 •Page 14 •Page 15 •Page 16 •Page 17 •Page 18 •Page 19 •Page 20 •Page 21 •Page 22 ♦Endnotes »Next page
|
|

|
Drypoint rulings visible near right-hand margin.
British Library Harley 5648
|
Ruling:
After the scribe had finished pricking, he would then rule the parchment. Until the late eleventh century, parchment pages were ruled with drypoint, using a piece of metal or bone to create indentations in the animal skin. The tools for drypoint were very sharp; occasionally, scribes cut completely through the parchment when ruling. With drypoint, it was only necessary to rule on side of the parchment, as the pressure from the knife or stylus would produce indentations in one side of the parchment -- say, for the purpose of this example, the hair-side -- and raised ridges on the other side -- here, the flesh-side. This pressure-based method also allowed scribes to rule more than one sheet of parchment at a time: as they ruled, the pressure would carry through into lower sheets, producing the same indentations and ridges throughout. Markings grew fainter on lower sheets, of course, and sometimes the lowest sheets would need to be re-ruled. |

|
Very dark vertical rulings done in plummet.
British Library Harley 3598
|
After the late eleventh century, scribes began to move away from ruling in drypoint and toward the practice of ruling in plummet -- a type of leadpoint. Graham and Clements suggest that the transition from drypoint to plummet occurred over several decades, and that "manuscripts ruled in drypoint can be found as late as the third quarter of the twelfth century" (17). Rulings in plummet can be identified by their grey or reddish-brown coloration; the lines are generally thin and granular, and sometimes hardly visible. Unlike scribes who ruled in drypoint, scribes using plummet had to rule both sides of a leaf of parchment, and could not rule any more quickly than one side at a time, as the plummet did not bleed through or create an imprint in multiple leaves at once. Plummet did carry several advantages, however: there was very little chance, if any, of ruining a sheet of parchment by pressing too hard, and scribes could erase poorly drawn lines with little leftover marking. |

|
|

The Genesis of a Medieval Manuscript
lquigley
You are here •Page 9 •Page 10 •Page 11 •Page 12 •Page 13 •Page 14 •Page 15 •Page 16 •Page 17 •Page 18 •Page 19 •Page 20 •Page 21 •Page 22 ♦Endnotes »Next page
|
|

|
Writing implements: |
An illuminated letter depicting a scribe in his study.
medievalfragments.files.wordpress.com
|

|
|

The Genesis of a Medieval Manuscript
lquigley
You are here •Page 10 •Page 11 •Page 12 •Page 13 •Page 14 •Page 15 •Page 16 •Page 17 •Page 18 •Page 19 •Page 20 •Page 21 •Page 22 ♦Endnotes »Next page
|
|

|
Writing implements:
Scribes who chose not to use lampblack for their work could turn to iron-gall or oak-gall ink, which "because of its acidic properties" would work its way "into the parchment rather than simply sitting on top of it" (Graham and Clemens 19). Our word ink is actually derived from this material, named incaustum in Latin because of its caustic properties (19). Medieval scribes would make this ink using oak galls, which are "the round excrescences produced on the twigs of an oak when the gall wasp lays its eggs in the buds of the tree" (Graham and Clemens 19). This solution is then mixed with a material, generally a type of metallic salt, to turn it black. A manuscript in the Newberry Library contains "a miscellaneous collection of recipes for ink (including invisible ink), various pigments, and glue" (Graham and Clemens 19). The recipe for ink requires oak galls to be heated in vinegar or wine, then mixed with gum arabic and iron sulfate, and finally let stand for at least a day in order to allow the mixture to blacken. While black ink was undoubtedly the most common, many manuscripts were recorded in brown ink, and illustrations and rubrication was done in a series of colors. Black ink can fade over time as well, and as a result many manuscripts recorded in black ink now appear in brown. |
Oak galls hanging from a tree.
www.whatsthatbug.com
|
Writing implements:
Scribes who chose not to use lampblack for their work could turn to iron-gall or oak-gall ink, which "because of its acidic properties" would work its way "into the parchment rather than simply sitting on top of it" (Graham and Clemens 19). Our word ink is actually derived from this material, named incaustum in Latin because of its caustic properties (19). Medieval scribes would make this ink using oak galls, which are "the round excrescences produced on the twigs of an oak when the gall wasp lays its eggs in the buds of the tree" (Graham and Clemens 19). This solution is then mixed with a material, generally a type of metallic salt, to turn it black. A manuscript in the Newberry Library contains "a miscellaneous collection of recipes for ink (including invisible ink), various pigments, and glue" (Graham and Clemens 19). The recipe for ink requires oak galls to be heated in vinegar or wine, then mixed with gum arabic and iron sulfate, and finally let stand for at least a day in order to allow the mixture to blacken. While black ink was undoubtedly the most common, many manuscripts were recorded in brown ink, and illustrations and rubrication was done in a series of colors. Black ink can fade over time as well, and as a result many manuscripts recorded in black ink now appear in brown. |

|
|

The Genesis of a Medieval Manuscript
lquigley
You are here •Page 11 •Page 12 •Page 13 •Page 14 •Page 15 •Page 16 •Page 17 •Page 18 •Page 19 •Page 20 •Page 21 •Page 22 ♦Endnotes »Next page
|
|

|
Writing implements: |
Text page with erasures and corrections in a different hand.
|

|
|

The Genesis of a Medieval Manuscript
lquigley
You are here •Page 12 •Page 13 •Page 14 •Page 15 •Page 16 •Page 17 •Page 18 •Page 19 •Page 20 •Page 21 •Page 22 ♦Endnotes »Next page
|
|

Overview:
Once the scribe has procured the parchment and prepared his ink, desk, and penknife, he is ready to begin the process of transcription. The remainder of the steps in manuscript production generally followed a clearly defined series of steps:
- Transcription in black ink
- Rubrication
- Illustration
- Correction
- Glossing
While the order of some of these steps are interchangeable (for example, illustration could occur before rubrication, and correction could -- and often did -- occur before the glossing process), scribes appear to have followed this sequence more often than not. The next few sections will explore in-depth each step in the process.
|
|

The Genesis of a Medieval Manuscript
lquigley
You are here •Page 13 •Page 14 •Page 15 •Page 16 •Page 17 •Page 18 •Page 19 •Page 20 •Page 21 •Page 22 ♦Endnotes »Next page
|
|

|
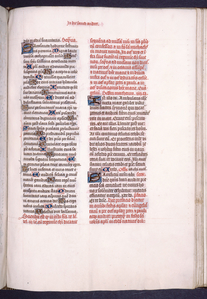
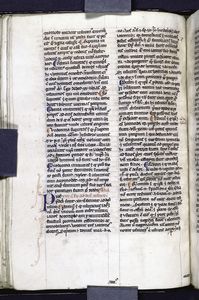
An example of a manuscript transcribed in what appears to be a uniform hand and brown ink.
Harley 1918 f. 105
|
Transcription: |

|
|

The Genesis of a Medieval Manuscript
lquigley
You are here •Page 14 •Page 15 •Page 16 •Page 17 •Page 18 •Page 19 •Page 20 •Page 21 •Page 22 ♦Endnotes »Next page
|
|


Red rubrication striking through much of the text, suggesting importance.
The Walters Art Museum, W.71, fol. 23r
|
Rubrication:
After the scribe handed off the manuscript to an artisan or illustrator, the process of rubrication would begin. Rubrication, literally from the Latin ruber, meaning red, is the process of imbuing titles, important letters, and even particular lines with color. Rubrication was important because most bound manuscripts contain more than one text, requiring that each text begin and end with a title. A cheap and relatively easy method of rubrication involves writing a title in black ink "then [brushing it] over with color to make the title stand out from the text" (Graham and Clemens 24). This method was favored on the Continent during the Merovingian and Carolingian periods; more common on the British Isles, however, was a method involving writing the title in ink then "[striking] through or [underscoring] the desired text with a line of red pigment" (Graham and Clemens 24). Far more common than either of these methods, however, is the practice of writing titles in red -- or occasionally blue. These titles required the original scribe to leave space for the rubricator to work; occasionally, when scribes failed to leave enough space, the artisan would write the title in the margin or even vertically on the manuscript (Graham and Clemens 24). Most rubrications appear in blue or red; these inks were made from colored lead. Red lead in particular can darken over time, however, and frequently "initials and titles that were originally bright red have blackened in part or even wholly," darkening nearest the beginning and end of a manuscript, "where the leaves were more exposed" (Graham and Clemens 25). Rubricators would also add in colored initials, but in the case of more elaborate illuminated initials, the manuscript would pass over to a more skilled artisan. |
Red rubrication that has darkened considerably due to age.
Spencer Collection Ms. 124
|
|
Very bright red and blue rubrication.
British Library Harley 3557
|
Sections marked in red and blue.
British Library Harley 3290
|


|
|

The Genesis of a Medieval Manuscript
lquigley
You are here •Page 15 •Page 16 •Page 17 •Page 18 •Page 19 •Page 20 •Page 21 •Page 22 ♦Endnotes »Next page
|
|

|
Text page with the gold of the letters scraped away.
British Library Burney 262
|
Illumination: |
Historiated initial "L"; space left for rubrication and illustration.
British Library Royal 13 D IX
|


|
Text page with space left for an incomplete initial.
British Library Arundel 131
|
Smaller letters visible to the left of illuminated letters; leftovers from the scribe's notes to the artisan.
British Library Burney 74
|


|
|

The Genesis of a Medieval Manuscript
lquigley
You are here •Page 16 •Page 17 •Page 18 •Page 19 •Page 20 •Page 21 •Page 22 ♦Endnotes »Next page
|
|


Scribal error corrected five lines from the bottom.
The Walters Art Museum, W. 102, fol. 39v
|
Correction:
The text would then pass to another scribe to begin the correction process. This was generally not done by the scribe responsible for the initial transcription of the manuscript; instead, a "corrector" would subject "the entire text to comparison with the exemplar from which it had been copied so that mistakes could be spotted and rectified". These correctors were generally older members of the scriptorium, all with more "textual familiarity and insight" than the younger members responsible for transcription (Graham and Clemens 35). Surviving medieval manuscripts display a wide range of mistakes, from eyeskip to dittography to inversion of word order. Eyeskip occured when the same "word, phrase, or sequence of letters appeared twice in close succession" in the exemplar, causing the scribe to lose his place in the process and skip sections of the text. This error has several subcategories: if it involves two words beginning with the same letters, it is termed homoeoarcton; if the words end in the same letters, homoeoteleuton (Graham and Clemens 35). Dittography is the opposite error; after copying an entire passage, a scribe might accidentally recopy it due to a similar word order. The inversion of word order is easily understood, and occurred relatively frequently within medieval texts. A corrector's job included using erasure and subpunction to fix many of these mistakes. For incorrect letters or even entire phrases, the corrector might use a penknife to scrape away the offending ink and replace it with his own correct insertion. This method is responsible for much of the cramped text found amongst medieval manuscripts; after erasing a mistake, the corrector might have to write in very small print to fit the correct phrase in the available space. Correctors might also place a series of dots under incorrect letters, then write the corrected letters immediately above them. If the error involved inverting word order, the correcting scribe would frequently write an "a" and a "b" above the reversed words to indicate which was to be read first. Marginal corrections were also common, using signes-de-renvoi to match the error to the marginal correction, much in the same manner that modern-day asterisks (*) match segments of the text to footnotes. These only came into common usage after the tenth century, however; prior to this, correctors would add hd or hs next to a mistake, directing the reader to look downward (hd: hic deorsum) or upward (hs: hic sursum). After completing correction, the manuscript would move onto the glossing stage. The example to the left contains a correction made by a scribe five lines from the bottom on the fifth letter. |
|
|

The Genesis of a Medieval Manuscript
lquigley
You are here •Page 17 •Page 18 •Page 19 •Page 20 •Page 21 •Page 22 ♦Endnotes »Next page
|
|

|
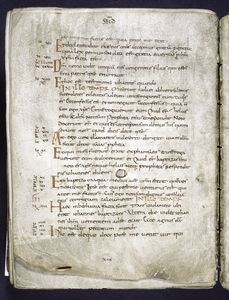
Marginal and interlinear glosses.
New York Public Library
|
Glossing
While some glosses were added long after the manuscript was completed, most were added before the binding process, copied directly from another manuscript along with the main body of the text itself. In many instances, both the glosses and the main text were drawn from the exemplar; in others, however, the glosses could be added from other relevant sources at the time of transcription and correction (Graham and Clemens 39). While early glosses tended toward simplicity, offering only basic explanations for words and phrases, later glosses became more complex, offering more information on arcane subjects as well as author opinions. As glosses, changed, so too did the methods with which they were applied to manuscripts. Early, simple glosses could often be added "in the interline directly above the textual element to which they related" (Graham and Clemens 39). The scribe would frequently use a smaller form of print to insert the gloss, in order to avoid crowding the main text. These simple glosses came in two general forms: the lexical gloss and the suppletive gloss. Lexical glosses "supplied one or more synonyms for difficult words or phrases in the main text," and generally began "with the abbreviation .i. for id est" (Graham and Clemens 39). Suppletive glosses, on the other hand, provided words or phrases not included in the main text. Latin texts, for example, often omitted the verb to be; a suppletive gloss would have added "the verb in its appropriate tense and person" (Graham and Clemens 39). Longer glosses would be entered in the margins and linked to the relevant text by a pair of signes-de-renvoi. As glosses grew longer and more complex, scribes adjusted the construction of the page itself. Margins grew wider, and the page would be ruled to receive "both main text and gloss" (Graham and Clemens 40). In these instances, the transcribing scribe would write both the main text and the glossing at the time of transcription, copying it directly from the exemplar. Bibles were among the most heavily glossed texts; also included in this, however, were legal texts, the Sentences of Peter Lombard, and all the works of Aristotle (Graham and Clemens 40). With the addition of glossing, the manuscript would be ready for binding. |
Text page with glosses built into planned spaces.
British Library Harley 3038
|


|
|

The Genesis of a Medieval Manuscript
lquigley
You are here •Page 18 •Page 19 •Page 20 •Page 21 •Page 22 ♦Endnotes »Next page
|
|

|
Manicula in the middle margin, halfway down the page, and in the bottom right corner.
British Library Royal 7 A X
|
Miscellaneous additions:
To the left is an example of a text with two maniculae pointing out important passages; to the right, an example of text with ornate line fillers. Below are two examples of manuscript leaves that have been repaired; on the left is an example of a hole sewn together; on the right, an example of a page that was torn in half with the addition of new parchment to complete it.
|
Elaborate line fillers.
The Walters Art Museum, W.102, fol. 39v
|

|
Mended tear in the bottom left corner.
British Library Harley 322
|
Half-page miniature largely obscured by a repair.
New York Public Library
|

|
|

The Genesis of a Medieval Manuscript
lquigley
You are here •Page 19 •Page 20 •Page 21 •Page 22 ♦Endnotes »Next page
|
|

|
Catchword decorated with a griffin.
British Library Harley 5648
|
Assembly: |
Quire signature (IIII) bottom center.
NYPL Digital Gallery
|
|
|

The Genesis of a Medieval Manuscript
lquigley
You are here •Page 20 •Page 21 •Page 22 ♦Endnotes »Next page
|
|

Binding:
After the assembly process was completed, the manuscript was ready to be bound. Not all medieval manuscripts were bound in hard covers; in fact, some were allowed to remain in their loose-quire form without binding. The midpoint between these two extremes was the loose parchment cover, which interestingly provided certain manuscripts with better protection than their stronger wooden brothers. Graham and Clemens note that during the flood of the River Arno in Florence in 1966, "manuscripts with parchment covers survived in better condition than those with wooden covers because the parchment backing allowed the manuscript leaves to shrink and expand at the same rate as the cover" (50). Still, most expensive medieval manuscripts were bound with wooden covers, in order to protect them as they sat on a shelf.
Wooden bindings followed a general procedure. From Graham and Clemens' Introduction to Manuscript Studies:
- The quires would be sewn onto several cords generally made of leather. A binder could use anywhere from two to five cords, depending on the size of the manuscript at hand.
- The ends of the cords would be fed into the wooden boards set to serve as the front and back covers of the manuscript. The wooden boards would generally be oak in northern Europe and beech in southern Europe. In order to avoid warping of the covers, the wood would be "quarter-sawn." Graham and Clemens elaborate: "rather than takin ga round length of tree trunk and sawing straight across it, a section shaped like a slice of pie would first be cut from the trunk, and then boards would be cut from this section" (51).
- After this, the boards themselves would be covered with skin and potentially decorated. Monastic libraries frequently used pigskin for this purpose, though calfskin and goatskin were also suitable to serve as binding covers. Occasionally the leather would be decorated "either by stamping a design into it or by blind-tooling it," or "working a simple pattern into the leather with a hot metal tool" (Graham and Clemens 53).
Most manuscripts were given bindings to allow them to sit on a bookshelf -- horizontally, not vertically like modern bookshelves! -- but there were methods of binding designed to allow readers to wear the manuscript on his or her body. Girdle bookbinding was a brand of binding that "allowed the manuscript to be carried at the belt" (Graham and Clemens 55). Here, the book cover extended past the edges of the manuscript pages as a flap or pouch and was tied in a knot at the end. This knot could then be slipped under a user's belt to allow the manuscript to dangle at the waist for easy access. These bindings were most common with Books of Hours and devotional texts (Graham and Clemens 55).
Below are examples of bound texts. To the left is an example of a girdlebound book; to the right, the cords used for binding are still visible in the inner margin.
|
A girdlebound book.
NYPL Digital Gallery
|
The binding is visible in the far right margin.
New York Public Library; MA 115
|

|
|

The Genesis of a Medieval Manuscript
lquigley
You are here •Page 21 •Page 22 ♦Endnotes »Next page
|
|

Rather than storing books upright on shelves as we do in the modern era, medieval bookkepers kept them lying horizontal in chests or cupboards. In fact, our modern library, a room designed specifically for the storage of books, did not come into existence until the late medieval period. Most of our knowledge on this topic comes from textual references and manuscript illustrations, which depict books as laying flat on shelves and rarely, if ever, in bulk. Whether in chests or in cupboards, however, books were usually "grouped by broad subject categories to aid finding" (Graham and Clemens 58). In fact, Humbert of Romans, the former master general of the Dominican order, demanded that the Dominicans arrange their book collections by subject, writing:
"Moreover, the cupboard in which the books are stored should be made of wood, so that they may be better preserved from decay or excessive dampness; and it should have many shelves and sections in which books and works are kept according to the branches of study; that is to say, different books and postils and treatieses and the like which belong to the same subject should be kept separately and not intermingled, by means of signs made in writing which ought to be affixed to each section, so that one will know where to find what one seeks" (Graham and Clemens 58).
Even after the rise of the modern library, in which books were collected and stored in bulk, medieval librarians would turn the books "with their spines facing inward and the fore-edges outward," explaining why with many medieval manuscripts the book titles were written across the page edges (Graham and Clemens 58). Some manuscripts also include a library shelfmark "usually entered on a front endleaf or one of the first pages of text and occasionally repeated at the back of the book" (Graham and Clemens 59). These shelfmarks allow modern-day scholars to reconstruct the manner in which these manuscripts were grouped in the proto-libraries of the Middle Ages.
Books in the thirteenth century were sometimes chained to their shelves as a means of preventing theft. The earliest chained libraries stored books on "a long, sloping lectern at which several readers could sit if there was a bench and stand if there was not" (Graham and Clemens 60). Later chained libraries did allow the books to be stored on shelves; however, the chain had to be long enough to allow the book to be removed and placed on a nearby desk for reading. Book theft was certainly a problem in medieval times, as evidenced by the number of chained libraries and prevalence of antitheft technology.
Below is the image of the back binding of a manuscript. Near the top center of the cover is a mark from a chain that once bound it to a library shelf.
|
Chain mark on the back cover of a manuscript.
Parker Library on the Web, 295220
|

|
|

The Genesis of a Medieval Manuscript
lquigley
You are here •Page 22 ♦Endnotes »Next page
|
|

|
Initials with pen-flourished decoration.
|
Our knowledge of medieval manuscripts is limited to the few that remain in the world, and as such the information presented here is factual but open to interpretation. There were many ways to produce a manuscript, and undoubtedly far more than we yet know, or perhaps can ever know. From the initial slaughter of the calf to create vellum to the final addition of the chain to prevent theft, manuscripts went through countless steps and countless hands before reaching their final stages. Even beyond this point, they were not free from editing, and thousands were doubtless changed and even destroyed in the last few hundred years. |
Historiated initial 'L'(iber) of the Tree of Jesse.
|


|
|

The Genesis of a Medieval Manuscript
lquigley
You are here ♦Endnotes »Next page
|
|

Works Cited:
Clemens, Raymond, and Timothy, Graham. Introduction to Manuscript Studies. Ithaca: Cornell University Press, 2007. Print.
Gumbert, J.P. "The Tacketed Quire: An Exercise in Comparative Codicology." Scriptorium 65.2 (2011): 299-320. Internet.
Images:
- Angel with book: http://www.britannica.com/EBchecked/media/70938/The-Angel-with-the-Millstone-manuscript-illumination-from-the-Bamberg
- Binding with chain mark: http://parkerweb.stanford.edu/parker/actions/thumbnail_view.do?size=basic&ms_no=524&page=bob
- Illuminated letter: http://medievalfragments.files.wordpress.com/2012/04/rouen-bm-312-f-002r-enlarged-2-1100-13001.jpg
- Golden angel: http://prints.bl.uk/art/406029/Angel_with_a_book
- Oak galls: http://www.whatsthatbug.com/wp-content/uploads/2010/08/oak_galls_jay.jpg
- Quire assembly: http://2.bp.blogspot.com/-Hk7fjjlL7lw/TV1flCG7xPI/AAAAAAAAAKA/VFv0JKhllD8/s1600/mark-end-folios.jpg
- Tally sticks: http://1.bp.blogspot.com/-puEAkDQoGiI/TrxBPya3ZzI/AAAAAAAAAMg/R6RXnfYz6_w/s1600/tally%2Bsticks.png
- Wax tablet: http://www.historyofinformation.com/expanded.php?id=1924
|
|
